Phoenix と Elixir をインストールして ブログを作りはじめます
Elixir は ErlangのVM上で動くプログラミング言語です。
確か5年くらい前に一度Erlangを勉強したことがあるのですが、関数型言語自体にはじめて触れたということや文法がちょっと馴染みのない感じだったこともあって、途中で挫折しました。
Elixirの作者の José Valim さんはRailsのコミッタでもあるので、Elixirの文法はRubyに似ています。また、このElixirで動くwebアプリケーションフレームワークが Phoenix になります。
まずはとっかかりとして、このブログ(kaeruspoon) 自体を Phoenix で実装していこうと思います。今日のところは素のPhoenixを起動してデフォルトのページをブラウザで見られるところまで進めてみました。
1. Elixir のインストール
まずは Elixir をインストールします。Macでは homebrew を使って簡単にインストールできます。
$ brew install elixir
これで Elixir がインストールできました。現時点のバージョンは1.0.5のようです。
$ elixir -v
Elixir 1.0.5
Rubyのirbと同様なものが iex という名前で用意されています。
$ iex
iex(1)> 1 + 1
2
Elixir自体はErlangのVM上で動作するので、もちろんErlangもインストールされています。
$ erl -version
Erlang (SMP,ASYNC_THREADS,HIPE) (BEAM) emulator version 7.0.2
2. Hex のインストール
Hex とは、Elixir や Erlang で使うパッケージ管理ツールです。Rubyでいうところのrubygemsですね。
$ mix local.hex
これでインスールできました。mix というのは Rubyの rake みたいなもののようです。
確認してみます。
$ mix hex
Hex v0.8.3
Hex is a package manager for the Erlang ecosystem.

Further information can be found here: https://hex.pm/docs/tasks
3. Phoenix のインストール
最新バージョンは Github上のPhoenix ( https://github.com/phoenixframework/phoenix )を確認してみてください。
現時点では0.16.1のようです。
Phoenix をインストールします。
$ mix archive.install https://github.com/phoenixframework/phoenix/releases/download/v0.16.1/phoenix_new-0.16.1.ez
4. node のインストール
Phoenixはアセット(javascriptとかcss)を扱うために brunch.io を使っています。このため、nodeもインストールしておきます。brunch.io を使わないのなら不要です。
$ brew install node
5. アプリケーションの作成
これで準備が完了しました。いよいよ、ブログを作るために Phoenixアプリを作成します。
ちなみにPhoenixはデフォルトで DBにPostgreSQLを使用します。今回はMySQLを使いたいので、以下のようにしてPhoenixアプリを作成します。
アプリの名前は kaeru_phoenix にします。
$ mix phoenix.new kaeru_phoenix --database mysql

* creating kaeru_phoenix/config/config.exs
* creating kaeru_phoenix/config/dev.exs
* creating kaeru_phoenix/config/prod.exs
* creating kaeru_phoenix/config/prod.secret.exs
* creating kaeru_phoenix/config/test.exs
* creating kaeru_phoenix/lib/kaeru_phoenix.ex
* creating kaeru_phoenix/lib/kaeru_phoenix/endpoint.ex
* creating kaeru_phoenix/test/controllers/page_controller_test.exs
* creating kaeru_phoenix/test/views/error_view_test.exs
* creating kaeru_phoenix/test/views/page_view_test.exs
* creating kaeru_phoenix/test/views/layout_view_test.exs
* creating kaeru_phoenix/test/support/conn_case.ex
* creating kaeru_phoenix/test/support/channel_case.ex
* creating kaeru_phoenix/test/test_helper.exs
* creating kaeru_phoenix/web/channels/user_socket.ex
* creating kaeru_phoenix/web/controllers/page_controller.ex
* creating kaeru_phoenix/web/templates/layout/app.html.eex
* creating kaeru_phoenix/web/templates/page/index.html.eex
* creating kaeru_phoenix/web/views/error_view.ex
* creating kaeru_phoenix/web/views/layout_view.ex
* creating kaeru_phoenix/web/views/page_view.ex
* creating kaeru_phoenix/web/router.ex
* creating kaeru_phoenix/web/web.ex
* creating kaeru_phoenix/mix.exs
* creating kaeru_phoenix/README.md
* creating kaeru_phoenix/lib/kaeru_phoenix/repo.ex
* creating kaeru_phoenix/test/support/model_case.ex
* creating kaeru_phoenix/priv/repo/seeds.exs
* creating kaeru_phoenix/.gitignore
* creating kaeru_phoenix/brunch-config.js
* creating kaeru_phoenix/package.json
* creating kaeru_phoenix/web/static/css/app.css
* creating kaeru_phoenix/web/static/js/app.js
* creating kaeru_phoenix/web/static/js/socket.js
* creating kaeru_phoenix/web/static/assets/robots.txt
* creating kaeru_phoenix/web/static/assets/images/phoenix.png
* creating kaeru_phoenix/web/static/assets/favicon.ico

Fetch and install dependencies? [Yn] y
* running npm install && node node_modules/brunch/bin/brunch build
* running mix deps.get

We are all set! Run your Phoenix application:

    $ cd kaeru_phoenix
    $ mix ecto.create
    $ mix phoenix.server

You can also run your app inside IEx (Interactive Elixir) as:

    $ iex -S mix phoenix.server
いろいろファイルが用意されました。ファイル構成やそれぞれの意味については後日まとめてみます。
とりあえずデフォルトのページを表示してみましょう。
以下でサーバを起動できます。最初はいろいろとコンパイル処理が実施されます。
$ mix phoenix.server
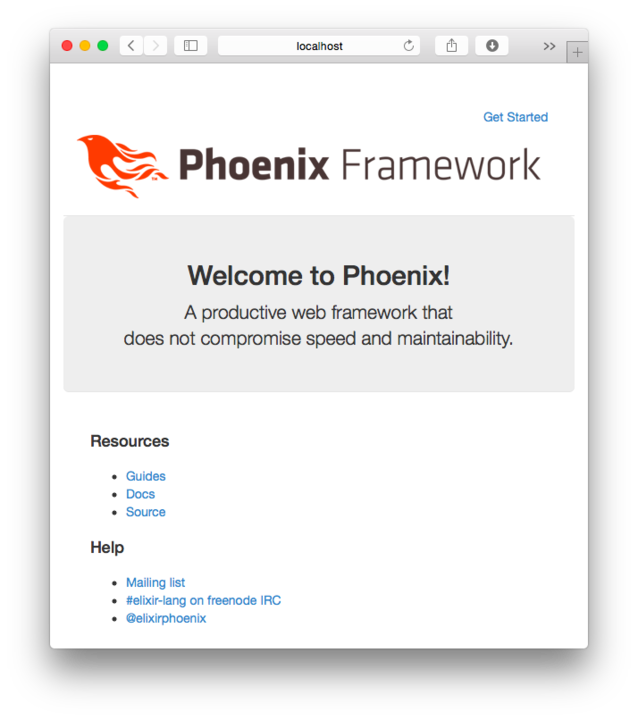
ブラウザで http://localhost:4000 にアクセスしてみます。

これで今回はおわりです。kaeru_phoenix はここで管理していきます。
