PhoenixとElixirでブログ記事を表示する。
PhoenixとElixirでブログを作るその2です。今日は記事を表示するところまですすめましょう。 (前回の記事 Phoenix と Elixir をインストールして ブログを作りはじめます )
1.DBのアカウントの設定
Phoenixは、configディレクトリの下に各environment用の設定ファイルを置いています。 一覧をみてみましょう。
$ ls config
config.exs  dev.exs  prod.exs  prod.secret.exs test.exs
config.exs の中から、実行時のenvironemntに応じて、対応する設定ファイルをインポートしています。
現時点では開発環境だけでいいので、 dev.exs を見てみます。ファイルの最後は以下のようになっています。
# Configure your database
config :kaeru_phoenix, KaeruPhoenix.Repo,
  adapter: Ecto.Adapters.MySQL,
  username: "root",
  password: "",
  database: "kaeru_phoenix_dev",
  size: 10 # The amount of database connections in the pool
特に悩むようなところはないと思います。前回、Phoenixアプリを作成したときに、 --database mysql オプションをつけたので、MySQL用の設定にちゃんとなっていますね。
オプションをつけ忘れていたら、PostgreSQLの設定になっていると思います。そのときは、Using MySQL を参考にして修正しましょう。
既存のRailsアプリが使っているので、すでにkaeruspoon用のデータベースは開発マシンのMac上に存在しています。database名は kaeruspoon_development なので修正します。
# Configure your database
config :kaeru_phoenix, KaeruPhoenix.Repo,
  adapter: Ecto.Adapters.MySQL,
  username: "root",
  password: "",
  database: "kaeruspoon_development",
  size: 10 # The amount of database connections in the pool
開発環境とはいえ、MySQLのアカウントが外に出る(Githubでリポジトリを公開しているので)は望ましくありません。
production環境では、別途 prod.secret.exs という設定ファイルを用意していて、 prod.exs からインポートしています。その上で、 prod.secret.exs はgitignore設定になっています。これをdevelopment環境にも適用しましょう。
dev.secret.exs ファイルを用意して、DBの設定を移します。
use Mix.Config

# Configure your database
config :kaeru_phoenix, KaeruPhoenix.Repo,
  adapter: Ecto.Adapters.MySQL,
  username: "xxxxxxx",
  password: "xxxxxxx",
  database: "kaeruspoon_development",
  size: 10 # The amount of database connections in the pool
dev.exs からはDBの設定を削除して、dev.secret.exs をインポートするようにします。
use Mix.Config
...

import_config "dev.secret.exs"
2.ジェネレータ
記事の表示は、Rails時代にはArticleControllerで行っていました。モデルはArticleモデルとArticleContentモデルです。
まずはジェネレータでこのあたりを一気に用意してみます。 mix phoenix.gen.html がそれをやってくれるコマンドです。
$ mix phoenix.gen.html Article articles title:string publish_at:datetime access_count:integer

Compiled lib/kaeru_phoenix.ex
Compiled web/channels/user_socket.ex
Compiled web/web.ex
Compiled lib/kaeru_phoenix/repo.ex
Compiled web/router.ex
Compiled web/controllers/page_controller.ex
Compiled web/views/page_view.ex
Compiled web/views/layout_view.ex
Compiled web/views/error_view.ex
Compiled lib/kaeru_phoenix/endpoint.ex
Generated kaeru_phoenix app
* creating priv/repo/migrations/20150814143423_create_article.exs
* creating web/models/article.ex
* creating test/models/article_test.exs
* creating web/controllers/article_controller.ex
* creating web/templates/article/edit.html.eex
* creating web/templates/article/form.html.eex
* creating web/templates/article/index.html.eex
* creating web/templates/article/new.html.eex
* creating web/templates/article/show.html.eex
* creating web/views/article_view.ex
* creating test/controllers/article_controller_test.exs

Add the resource to your browser scope in web/router.ex:

    resources "/articles", ArticleController

and then update your repository by running migrations:

    $ mix ecto.migrate
いろいろファイルが作成されました。
3.ルーティング
ジェネレートしたときのメッセージにあるように、routersも設定しておきましょう。
web/router.ex がそれになります。
defmodule KaeruPhoenix.Router do
  use KaeruPhoenix.Web, :router
  ...
  scope "/", KaeruPhoenix do
    pipe_through :browser # Use the default browser stack

    get "/", PageController, :index
  end
end
pipelineというキーワードがファイル内に登場しますが、それはまたの機会に調べます。
PageController は最初から用意されているコントローラで、前回の記事で表示したwelcomeページはここで処理されてます。後で削除すると思いますが、とりあえずこのままで。
Railsのroutesのresoucesと同じようなものが用意されているようです。今回はshowアクションだけ処理できけばいいので、以下のように scope ブロックの中に追加しました。
  scope "/", KaeruPhoenix do
    pipe_through :browser # Use the default browser stack

    get "/", PageController, :index

    resources "/articles", ArticleController, only: [:show]
  end
routerで設定されているURLの一覧は mix phoenix.routes コマンドで表示できます。
$ mix phoenix.routes
   page_path  GET  /              KaeruPhoenix.PageController :index
article_path  GET  /articles/:id  KaeruPhoenix.ArticleController :show
4.コントローラ
web/controllers/article_controller.ex がcontrollerになります。Railsのscaffold的にいろいろと用意されていますが、まずはshowアクションだけあればいいのでそれ以外は削除します。
defmodule KaeruPhoenix.ArticleController do
  use KaeruPhoenix.Web, :controller
  alias KaeruPhoenix.Repo
  alias KaeruPhoenix.Article

  def show(conn, %{"id" => id}) do
    article = Repo.get!(Article, id)
    render(conn, "show.html", article: article)
  end
end
showアクションはふたつの引数を取ります。一つ目の conn はリクエストデータを保持しているようです。詳細はいずれ。
ふたつ目の引数が、Railsでいうところのparamsにあたります。実のところ、現時点でElixir自体の文法はなにひとつ知らないのですが、Erlangのパターンマッチと同じことをやっているようです。
つまり、showメソッドの第2引数に、キーが “id” の Hash(ElixirなのでHashじゃないけど)が渡ってきたときだけ、このメソッドを実行します。
これってつまり、アクションが受け取れるパラメータをここで指定できるというのと同じですね。便利。
showアクションの中身についてはまたいずれ。でも見たとおりのままですね。渡されてきた id と一致する id を持つarticlesテーブルのレコードを取得して、articleという変数に保持している。
renderメソッドはRailsのrenderと同じでしょう。レンダリングするファイルは show.html で、articleを渡しています。
5.テンプレート
web/templates/articles ディレクトリの下にHTMLを生成するためのテンプレートファイルが置かれます。 eex という拡張子になっていますが、Rubyのerbに似ています。
今回必要になるのは show.html.eex だけなので、それ以外のファイルは削除しておきます。 show.html.eex は以下のように修正しておきます。
<h3><%= @article.title %></h3>
@articleというのが、コントローラのrender関数の第三引数で指定した article: article に対応しています。articleというキーから @article という変数が作られて、その内容が値である article(articlesテーブルの1レコードのデータを保持している) になるようです。
ここではとりあえず記事のタイトルだけを表示するようにします。
6.ビュー
web/views/article_view.ex ファイルは、Railsでいうところのhelperに近いです。
今のところはまだ使わないのでいずれ調べましょう。
7.マイグレーション
Railsと同様に、migrateの仕組みがPhoenixには用意されています。migrationファイルは、priv/repo/migrations/ 下に作られます。
さきほど作成した xxxx_create_article.exs を見てみます。
defmodule KaeruPhoenix.Repo.Migrations.CreateArticle do
  use Ecto.Migration

  def change do
    create table(:articles) do
      add :title, :string
      add :publish_at, :datetime
      add :access_count, :integer

      timestamps
    end
  end
end
見ただけでだいたいわかりますね。Railsにそっくりです。
migrateの実行は、 mix ecto.migrate コマンドを使います。ただ、ぼくの環境ではarticlesテーブルはすでに存在しています(Railsで使っていたので)。なので、今回はmigrateは行いません。migrationファイルもコメントアウトしておきます。
記事の本文はarticle_contentsテーブルにあります。migrateはしないですが、ジェネレータでモデルだけを作成します。
$ mix phoenix.gen.model ArticleContent article_contents article_id:references:articles body:text
* creating priv/repo/migrations/20150814160129_create_article_content.exs
* creating web/models/article_content.ex
* creating test/models/article_content_test.exs
このmigrationファイルも使用しない(article_contentsはすでに存在している)のでコメントアウトしておきます。
8.モデル
モデルはweb/modelsの下に置かれます。先にArticleContentを見てみます。
defmodule KaeruPhoenix.ArticleContent do
  use KaeruPhoenix.Web, :model

  schema "article_contents" do
    field :body, :string
    belongs_to :article, KaeruPhoenix.Article

    timestamps
  end
  ...
end
schemaでテーブルの構造もわかるのはいいですね。ActiveRecordにも欲しいです。
さて、ひとつだけ注意があるのですが、それは timestamps です。Railsだと、 created_at と updated_at になるわけですが、Phoenixの場合、 created_at でなくて inserted_at という名前になっています。
Railsで使っているので、 created_at を使いたいところです。この場合、以下のように修正すればOKです。
schema "article_contents" do
  field :body, :string
  belongs_to :article, KaeruPhoenix.Article

  timestamps([{:inserted_at,:created_at}])
end
次にArticleモデルを見ます。
defmodule KaeruPhoenix.Article do
  use KaeruPhoenix.Web, :model

  schema "articles" do
    field :title, :string
    field :publish_at, Ecto.DateTime
    field :access_count, :integer

    timestamps
  end
end
こちらもtimestampsの設定をしておきます。
また、 has_one の設定も追加しておきます。
schema "articles" do
  field :title, :string
  field :publish_at, Ecto.DateTime
  field :access_count, :integer
  has_one :content, KaeruPhoenix.ArticleContent

  timestamps([{:inserted_at,:created_at}])
end
association名を content にしているのは、 article.article_content というように書きたくないためです。
9.コードの修正
ブログの記事も表示したいのでコードを修正します。
まずはテンプレート。web/templates/article/show.html.eex を以下のように修正します。
<h3><%= @article.title %></h3>
<p><%= @article.content.body %></p>
サーバを起動します。
$ mix phoenix.server
ブラウザで http://localhost:4000/articles/1 にアクセスします。
ところが以下のようなエラーになりました。
[error] #PID<0.287.0> running KaeruPhoenix.Endpoint terminated
Server: localhost:4000 (http)
Request: GET /articles/1
** (exit) an exception was raised:
    ** (KeyError) key :body not found in: #Ecto.Association.NotLoaded<association :content is not loaded>
テンプレートで @article.content にアクセスしているところでエラーになっています。association先のモデルがロードされていないと出ています。
ここはRailsと違っていて、association先を勝手に読んではくれないのです。articleを取得するときに、association先も指定しておきます。
コントローラを以下のように修正します。
def show(conn, %{"id" => id}) do
  article = Repo.get!(Article, id) |> Repo.preload(:content)
  render(conn, "show.html", article: article)
end
Repo.preload でassociation先も読み込んでいます。
|> という変な記号は Exlixir のパイプライン演算子というものです。これもまた後日にちゃんと勉強します。
これでもう一度ブラウザでアクセスしてみましょう。

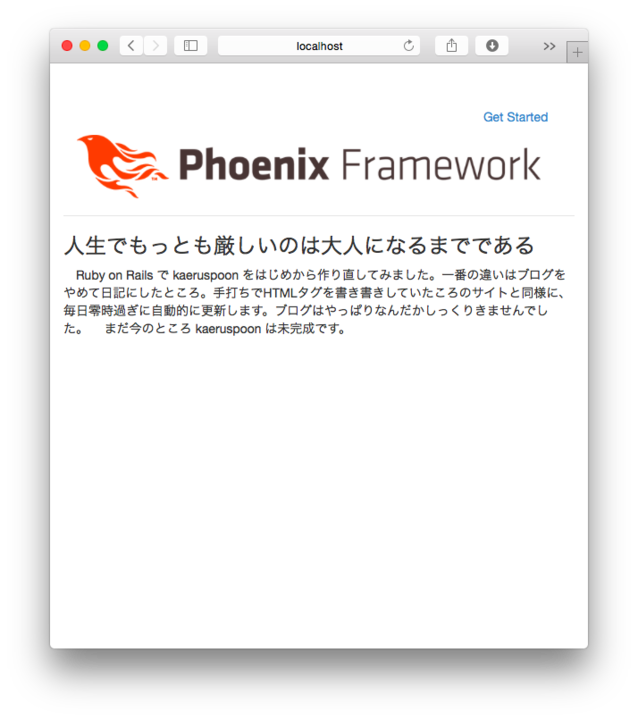
ちゃんと表示されました。今日はここまでです。
次回は一度 Phoenix を離れて、いよいよ Elixir について勉強してみようと思います。
